PRELUDE TO THE PARK
By
Chuck Roberts
Teaching skiers the “how to” of terrain park moves is an exciting and growing area of interest at PSIA. More skiers are enquiring about terrain park lessons and more instructors are being asked to teach terrain park lessons. Several articles have appeared in the profession’s magazines (Pro Skier, 32 Degrees) discussing basic moves and progressions related to terrain park ski instruction. As in other teaching progressions, the tenet is to start out with the basics, and terrain park ski instruction is no exception. Prior to taking your class over to a practice feature, some basic beginning moves introduced at this time can be very helpful to students as they progress through the terrain park curriculum. The following introductory moves are fun and make a great lesson sequence for your beginning park rats. It should be noted that the progression presented is one way to introduce your skiers to terrain park moves and is not exclusionary.
Skiing switch (skiing backwards)
A very important maneuver is the ability to ski backwards, or switch. Many skiing tricks on a fun box entail a 180 on with the skier exiting the feature switch. Rotary aerial tricks in the half pipe often require takeoff switch or landings switch. Some more advanced tricks involve approaching the feature in a switch skiing position, skiing up the ramp and spinning from switch skiing to regular skiing.
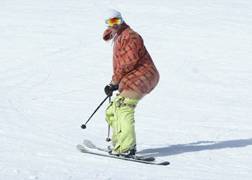
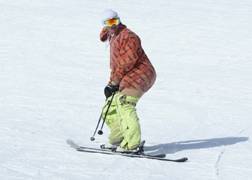
Photo 1a Photo 1b
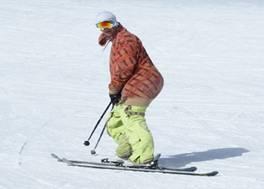
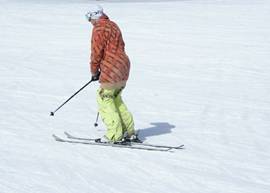
Photo 1c Photo 1d
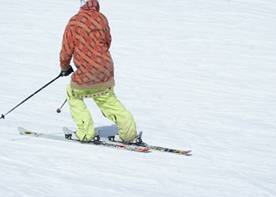
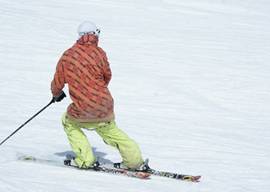
Photo 1e Photo 1f
Photo set 1 depicts a switch skier performing basic parallel turns switch. In Figure 1a the skier is looking in the direction of travel, a basic tenet in switch skiing. Skis are scissored, allowing the hips to rotate, making rearward viewing much easier. Photos 1b and 1c show the control and completion phases of the turn. In Photo 1d the next turn is initiated with center of mass movement in the direction of the new turn and simultaneous rotation of the head nearly 360 degrees in order to look in the direction of the travel. The scissor position is reversed to aid in looking in the direction of travel (Photos 1e and 1f). Pole baskets are kept higher than when skiing regular since pole engagement in the snow may cause loss of balance when skiing switch.
Some skiers (Photo2) have sufficient flexibility to rotate the head in the direction of travel without scissoring the skis. This is fine for elementary moves over a feature but when radical rotation is required (360 on), having a slight edge at takeoff (Photo 1b) makes a great platform for the pre-wind and resulting rotation.

Photo 2
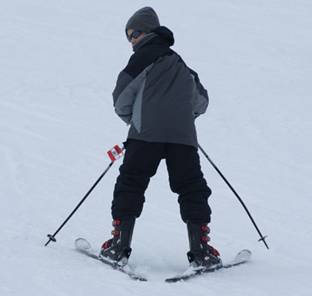
Photo 3
Photo 3 shows a student trying switch skiing for the first time. The reverse wedge often develops out of caution as a result of being out of one’s comfort zone. The wedge will tend to disappear as more confidence is realized. Ski pole baskets could be a little higher to avoid engagement in the snow. It should be noted that twin tip skis are not necessarily required for this basic progression. However, when performing rotary moves onto a feature, twin tips are highly recommended, along with helmets. The student in Figure 4 is performing relatively well with the exception of not looking in the direction of travel. Looking in the direction of travel cannot be over emphasized.
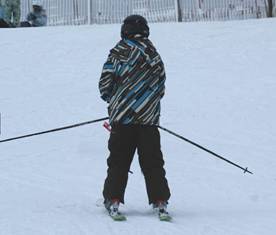
Photo 4
Surface spins
The 360 degree surface spin is a great exercise to prepare your beginning terrain park students for more advance rotary moves. It is relatively easy to master, and your students will be delighted to perform a cool trick in a proficient manner. Photo set 5 shows the surface spin 360. From the parallel position (Photo 5a) initiate a turn uphill, keeping more weight on the outside ski (Photo 5b)
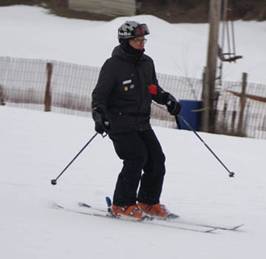
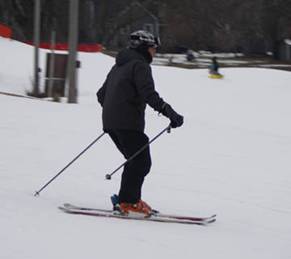
Photo 5a Photo 5b
Continue rotating with weight on the outside ski (Photo 5c) until the switch skiing position is reached (Photo 5d).
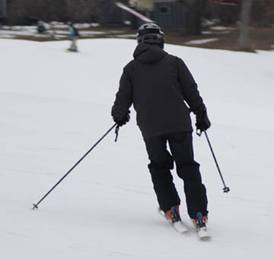

Photo 5c Photo 5d
Then shift the weight to the new outside ski (Photo 5e) and continue rotating to the parallel skiing position (Photo 5f).
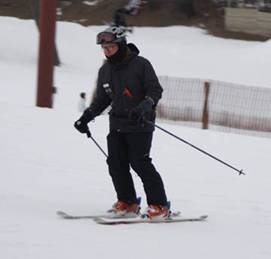
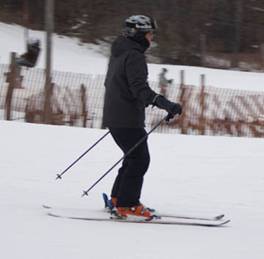
Photo 5e Photo 5f
Skis should be parallel and relatively flat for this maneuver.
A typical difficulty encountered by students is depicted in Photo 6: engagement of an edge in the snow during the spin. This can occur from not shifting the weight to the new outside ski when reaching the switch position or not keeping the skis relatively flat. Excessive wide track stance also leads to edge engagement in the snow when skis are wider than shoulder width. Statically position your students to determine if their basic stance allows flat skis. It should be noted that these elementary tricks often expose flaws in basic skiing, which will require correction during your lesson.
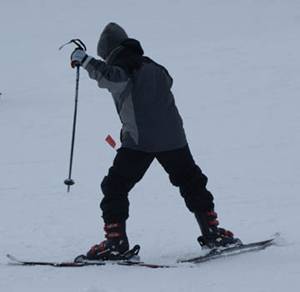
Photo 6
A great exercise to correct this is to practice the 360 with the skier’s weight totally applied to the outside ski as shown in Photo set 7. From the parallel regular skiing position (Photo 7a), the student places all the weight on the outside ski, lifting the inside ski (Photos 7b and 7c). When reaching the switch position, weight is transferred from the old outside ski to the new outside ski (Photos 7d, 7e, 7f and 7g). Totally weighting one ski and lifting the other makes the 360 easier, reducing the possibility of edge engagement. After several practice runs, both skis can be brought back on the snow surface, having solved the problem of edge engagement.
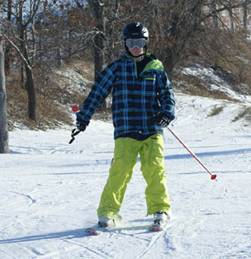

Photo 7a Photo 7b
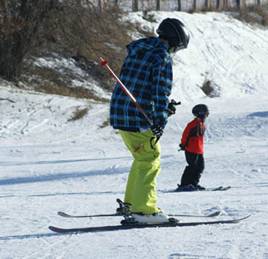
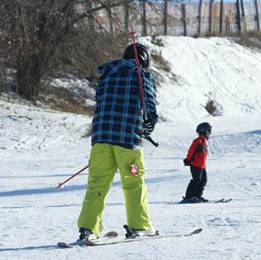
Photo 7c Photo 7d
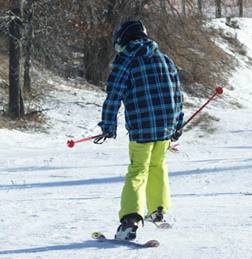
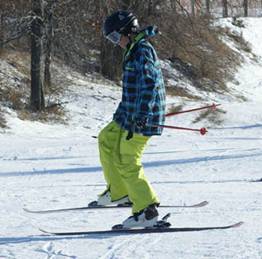
Photo 7e Photo 7f
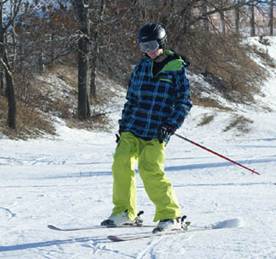
Photo 7g
The Jump to Switch
A fun trick to perform is jumping to the switch skiing position rather than spinning 180 degrees on the snow surface. This gives the student a chance to experience pre-wind and unwind, basic ingredients in more advanced aerial moves. Photoset 8 depicts the jump to switch. From the parallel regular skiing position, flex knees and ankles and rotate the upper body in the direction of intended rotation (pre-wind, Photos 8a and 8b). Extend the knees and ankles to release the stored rotational energy from the pre-wind and get air (Photo 8c). During the hop, the skis should be rotating to the switch skiing position with the upper body aiding this by counter rotating. Land skiing switch (Photo 8d), looking in the direction of travel.
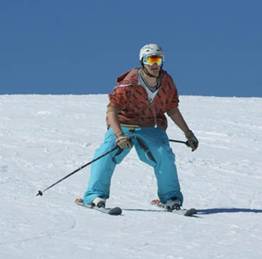

Photo 8a Photo 8b
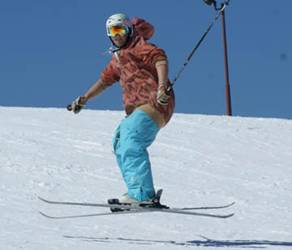
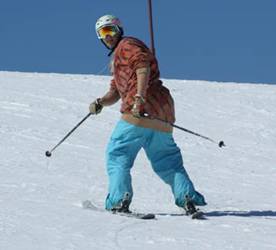
Photo 8c Photo 8d
Photo 9 shows a student performing a relatively good try at the jump to switch. Typically, insufficient pre-wind and counter rotation results in a jump 90 rather than the jump to switch (180 degrees). Practice statically pre-winding and then jumping to assure that your students can generate the angular momentum necessary for the 180 rotation in the air.
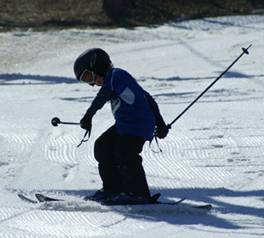
Photo 9
Pivot slip exercises
The classical pivot slip with a hop is a great exercise for practicing mounting of terrain park features. Photo set 10 depicts the maneuver. Photo 10a shows the skier in the parallel skiing position. Figure 10b shows flexion of knees and ankles in preparation for the hop. Figure 10c shows the pre-wind prior to extension. Figure 10d shows air slightly after extension and the lower body rotating 90 degrees with the upper body counter rotating. Photo 10e shows the landing on flat skis with the skis rotated 90 degrees.
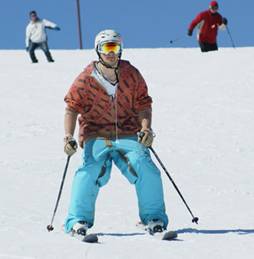
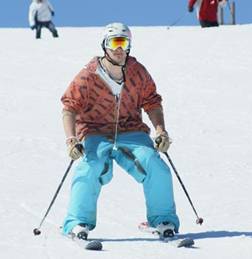
Photo 10a Photo 10b
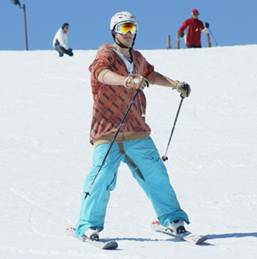
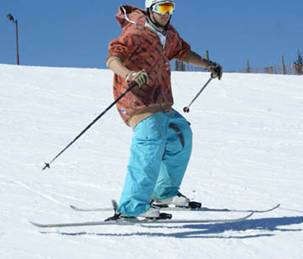
Photo 10c Photo 10d

Photo 10e
The skier in Figure 11 has attempted a first hop pivot slip. Notice that the skis are not perpendicular to the direction of travel, which is facing in the direction of the camera. Practice statically pre-winding and jumping 90 degrees (or 180 degrees to over-emphasize the pre-wind.) Also indicate that equal weight distribution and flat skis (which are lacking in Figure 11) will be necessary for learning how to ride rails and boxes in the future.
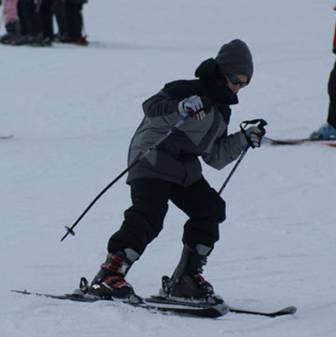
Photo 11
When performing the previously discussed maneuvers, a comment on pole positions is warranted. Pole and hand positions should be relaxed, comfortable and ready to react. When skiing switch, poles should be positioned such that the pole tips do not engage in the snow. One can ski regular and allow the pole baskets to drag in the snow, but don’t try this when skiing switch.
Recap
1. Introduce switch skiing and switch skiing turns to prepare for the terrain park and more advanced moves.
2. Practice surface 360’s to get students familiar with whole body rotation.
3. Try jumping 180 degrees from normal skiing to switch skiing to practice pre-winds, unwinds and small airs.
4. Practice hop pivot slips to get used to takeoffs when mounting features (rails or boxes).
This beginning terrain park teaching sequence yields a fun lesson for your aspiring terrain park skiers. It is helpful to develop basic terrain park skiing skills on snow without terrain park features to facilitate learning at the more advanced levels in the park. Conversations with many advanced terrain park skiers suggest that may of them have learned their craft by trial and error. This teaching progression of basic moves to learn outside the park reduces the error factor and increases the probability of success.